Wheel Card Supplies
Cardstock (I used 12x12" and scrap, but you can use anything you have on hand)
Scissors
X-Acto Knife
Brad
Ruler or Paper Trimmer
Pencil and eraser
Markers, crayons, paint, or whatever your coloring tool of choice is
Glue Dots
Optional: Hole Punch (you can use an x-acto knife, pin or sharp scissor tip if you don't have a punch)
Step 1. Decide what size you want your card to be, and make sure your paper is 3x as long as the finished width and 1x as tall. For mine, I wanted a square card, so I started with a 12" x 4" piece of card stock.
Step 2. Fold your card into 3 equal sections. I used a ruler along each side to indicate where each 4" interval was reached. From there, I used lined my ruler up to each tick mark and gently folded the paper. I did this for each fold and made sure that the paper lined up correctly before going back and scoring with a harder edge.
Step 3: Using a pencil, sketch a design for your card on the first flap of your card. It can be anything - it just needs a middle element that will be a part of the final card.
Step 4: Use your x-acto knife and cut our your design.
Step 5: Once your design is cut, make sure to erase all of your sketch marks.
Step 6. Take another piece of card stock and measure it to your finished card size. From there, cut your circle. For this particular project, the circle doesn't need to be perfect.
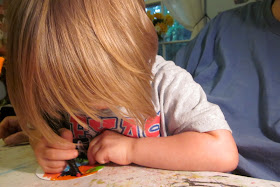
Step 7. Give your kid the circle and your favorite coloring tools of choice and let them go to town.
Watch their little faces for concentration. Enjoy their process of filling in all of the spaces. Give your kid a high-five when they are all finished!
Step 8: Punch/create holes. First, punch a hole in the middle of the design you have created on the first flap of your card. Once you have that card, fold the card over so that it's laying on top of the middle flap. When you take this step, make sure that the third flap is still open, otherwise you might accidentally cut the inside of the card.
Once you have your card punched, take your circle and line it up in the middle of your design. Rotate the circle around to make sure that it doesn't get to wongo (technical term) on any particular side. Once you are satisfied with where the middle is, either note it with a pencil or go ahead and punch/create the hole. Make sure that the hole in your circle has a little extra wiggle room than the hole in the card. Doing this will ensure that the piece spins easier.
Step 9. Insert your brad through all three layers. You will see the back of the brad on the inside left cover of your card. You can always cover this with a piece of paper, sticker or some other thing. I chose to just leave mine exposed for this card.
Once you have the brad in, notice where you circle falls. Mine fell slightly inside my card, so I trimmed the edge of my paper slightly to create a lip so that the circle was easier to grab and spin. I also created a little notch.
Step 10. Once you have your notch and you've tested the spinning action, use two small glue dots and affix them to the corner of each card cover so that the circle is enclosed inside the folds. You could choose to glue all of the edges except for the one that is used to turn the wheel, but because Em was involved, I chose the simple way out which works just fine.
Step 11. Write your note on the inside and give to your special someone.


No comments:
Post a Comment