At the beginning of the year, I chose a word to carry with me throughout 2011. I spent the last 3 months of 2010 thinking about different words, but over and over again, I came back to the word, mindful, which became my word for the year. When I chose the word, I don't think I really had any clue as to how much of an impact it would have on my world.
I knew that I wanted to use the word as a way to set and keep intention. I spent a lot of 2010 pretty checked out. I didn't listen to myself, I didn't pay attention to my dreams or wants or interests consistently and I knew coming into 2011 those were areas I wanted to change. Being mindful of what I want, and more importantly, what I need has allowed me to communicate with others more effectively. It has allowed me to hold boundaries because I am mindful of what I need. It has helped me to say no to things that otherwise I might be prone to give in to. It has helped me create space in my life for things that are important to me and in doing so, I feel more confident and more clear on what I want and don't want in my life.
I knew that this would help me stay accountable for my goals, but what I didn't know was that it would allow me to hear feedback and criticism in a more constructive way. I mean, no one likes to hear that they are doing a bad job, but knowing what I want and need to do and recognizing the areas that still "need improvement" makes it easier to hear that feedback from other people. The result of this has been less negative self-talk. I can accept my imperfections more and can own up to the fact that I still fall short in some areas - like cleaning the cat box.
The most powerful part of this word selection so far has been the sense of accomplishment I have. I've set several small goals for myself, and while I haven't met them all, I am so proud of the ones I've achieved. I'm also proud of myself for setting so many to begin with. This act alone, is such a huge improvement over the past couple of years. I feel that I am living with intention - for myself and for my family. I'm listening to my gut and it's been such an awesome ride. Not each day has been perfect, and there have been LOTS of times over the past 6 months where I've fallen down, fallen short, lost my temper, lost my cool or felt out of control, but the process of getting out of those negative spaces or situations is becoming easier. I ask myself what I need. Sometimes I know right away. Sometimes I have to sit with it for a couple of days, but each time I've asked myself this question, I've figured it out.
I've also been able to compartmentalize certain areas better so that a negative situation in one area of my life does not negatively impact other areas. I think the biggest area I've seen this with has been my mommy skills. I am not a perfect mom. Sometimes I embarrass myself or can't believe the things that are coming out of my mouth, but there are times when I've had a crappy day at work and I just want to come home and whine or moan but then I think of the kind of mom I want to be and I'm getting better at being able to reset myself so I can be the happy, calm(er) mom that I'm trying to be. Again - I'm not at all perfect, but it all feels like good, forward progress, and who doesn't love that?
I'm really looking forward to the rest of the year with my little word.
Wednesday, May 25, 2011
Tuesday, May 24, 2011
Fairy Love
On Sunday we went to the Georgia Renaissance Festival. I wasn't sure how the day was going to go since this was the first big festival for Em. It started out a bit rocky, but after getting enough carbs in that little body to support her current growth spurt, she perked up and we managed to have a really fun day. The best part?
Those fairies up there.
Now, I've mentioned our fondness of fairies before, but I really wish there was a way I could send these fairies a thank you note and basket full of love, because I totally would. They made my little girl's day, even if we were a bit stalkerish about it. We first met them under the tree. Emily said hello and they were each very friendly and we asked to take a picture, which they accommodated.
From there we went on our merry way, only to find that they were doing a show in one of the pavilions a few hours later. We went in, and they brought her up to the front to meet the fairy queen who remembered her from earlier. They gave her some fairy dust and returned her back to me. That hand over mouth move she's got going on -- that's 'I'm really happy, but really shy' move.
We hung out in the show for awhile, but Em really wanted to get her face painted and then come back to see the fairies, so we snuck out and headed for the face painting tent, where she wound up with a unicorn on her arm. As soon as the painting was done, she turned to me and said, "Mommy, I want to show the fairies my unicorn." So being the supportive Mommy that I try to be, I said ok, and off we tromped to the other side of the park.
We returned to the pavilion only to find that the show was over, but I caught a glimpse of the fairies walking around a corner. We ran, and got about 30 feet away and I told Emily to run and catch them. Let me pause here to say that ordinarily the overly protective mama bear in me would have never have let her go that far away from me, but there were only about 4-6 other people in the area at that time and I really wanted to see if she'd go up without me. She took off and caught up to the fairies. She held her arm out, and they all stopped, turned around and cooed over her unicorn, and her. I almost burst into tears because of how proud and happy she was. She talked about them all the way home, before bed and throughout today.
They are magic, those fairies. They are.
Sunday, May 22, 2011
Sunday morning fort
Like most kids, we go in cycles with books. We might read the same book over and over for days, and then we don't pick it up for months. Lately, we've read a lot of "If you give a pig a party." I was the first one to get up this morning and was hanging out in the paint room, when Em came in and said, "I want to do what the pig does."
At first, I wasn't sure what she meant. I mean, it was before 7am and I hadn't finished my first cup of coffee yet. Then she said, "in the book" and I knew right away what she meant, but by that time she was off to find the book so she could show me. Sure enough, she wanted a fort.
So I built a small one, which she is still arguing with me that it needs to be bigger. I also gave her a 'mix.' We do mixes around our house when we are on the go, or for the occasional break out of the mold breakfasts. Mixes go into a plastic bag and are usually a combination of cereal, raisins, craisins, nuts, some times pretzels, and always a small spoon of chocolate chips to make it fun. We just dump it all in, and shake. I must have shook the bag extra good this morning because I was just asked, "why did you hide the chocolate chips so good?"
Hope your Sunday is filled with things you love.
At first, I wasn't sure what she meant. I mean, it was before 7am and I hadn't finished my first cup of coffee yet. Then she said, "in the book" and I knew right away what she meant, but by that time she was off to find the book so she could show me. Sure enough, she wanted a fort.
So I built a small one, which she is still arguing with me that it needs to be bigger. I also gave her a 'mix.' We do mixes around our house when we are on the go, or for the occasional break out of the mold breakfasts. Mixes go into a plastic bag and are usually a combination of cereal, raisins, craisins, nuts, some times pretzels, and always a small spoon of chocolate chips to make it fun. We just dump it all in, and shake. I must have shook the bag extra good this morning because I was just asked, "why did you hide the chocolate chips so good?"
Hope your Sunday is filled with things you love.
Thursday, May 19, 2011
How To Make: Disney Autograph Book
My birthday is coming up. My 40th birthday. A lot of folks are shy about this number. Not me! I love my birthdays, and I especially love my decade birthdays. I'm celebrating my 40th at Disney and I am SO excited! We will also be unofficially celebrating my daughter's birthday who will turn 4 ten days after I turn 40, but everyone in the travel party is clear on the fact that it's my birthday first. Yes - I'm that girl...I get obnoxious. :)
Anyway, we are bringing 3 girls, and while this trip has been something we've been planning on for quite some time, I still want to find ways to cut costs where possible. I decided to make autograph books for the girls instead of buying them at the park. Considering I had most of the supplies on hand, I was able to make 3 books for about $8, and my guess is that is probably the cost of 1 in the park.
Autograph Book Supplies:
Cardboard/chipboard
Cardstock for cover
Cardstock or drawing paper for inside pages
Ruler
Pen/pencil
adhesive/glue stick
hole punch
scissors/paper trimmer
brads/yarn/page rings/some type of closure for the binding
Step 1: Decide the page size since it will determine the size of the cover. I decided to go with a finished 4" x 6" page, but to allow room for the binding, my inside pages were 4" x 7". I added an inch to those measurements to allow for the cover. Once determined the size, I cut my chipboard to size. For this project, I actually did two layers of chipboard just because I wanted extra sturdiness.
Step 2: Create the bind edge. Once I had my chipboard cut to the 4" x 7" size, I cut an inch off. I did this so that the cover had more give in order to allow for the book to open flat but still maintain sturdiness. I was making 3 books, so I took an assembly line approach and cut everything all at once.
Step 3. Cut your cover cardstock. For the cover, I added 2 inches to the size of the chipboard, so I cut 7" x 9". This is going to be an example of an imperfect project. The sad part is, I realized my mistake on the first book, but repeated the same stinkin' mistake on my second book. You'll see it at the end if you haven't noticed already.
Step 4. Center your chipboard on the back side of your cover paper. If you have been hanging around the blog for awhile, you've probably already guessed that I just eyeballed this. If you are new, I'm not all into perfect measurements. Just get it close enough and move on to the next step.
Next step, adhere your flaps down. Make sure you get it tight against the edges.
Next, I found the half inch mark on each short line and marked the spot with an x.
And then I punched. Note - if you are doing 3 of these suckers, go ahead and invest in a 3 hole punch. I used to have one and don't know where in the world it took off to, but after this project of punching 100+ holes, I'm getting a new 3-hole punch.
For those of you who are taking the single hole route, you only need to draw/mark one page. From there, just stack 2-3 (whatever is not too stressful to cut through) pages behind the already cut page, and line your punch up to cut within the holes you have already cut. Repeat this process until you have all of your pages cut. For each new batch, I used a different template to work from. I did this to lessen my chances of cutting the holes too big on one page which inevitably happens when using the same template over and over. For each book, I did about 20 pages.
Step 11. Back to the cover. Ok, so in the first picture did you notice that little Sharpie marker? Well, I thought it would be a good idea to fasten the pens to the books. So here's how I did it. Take the big glue dots and run a line of them down your back cover. I chose to place mine right by the binding, but you can choose another area - whatever is most comfortable for you.
Step 12. Cut a long piece of ribbon. I cut about a foot and a half of thin red ribbon. I placed it on top of the glue dots like you see above.
Step 13 (picture not available), cover both of your inside covers with cardstock. For my inside cover, I chose a paper that complimented my covers. Since the total size of the cover was 4" x 7", I subtracted about 1/4" of an inch total - 1/8" on each side. Put a lot of adhesive on this paper, making sure that you have it running up against the edges of the paper.
Step 14. Take one of your inside pages and line it up along the spine of the back cover. Mark another x, and punch holes.
To keep small fingers from opening the brads, I covered each one with stickers.
Step 17. Attach the Sharpie. These were perfect since they had the little hook on the cap. I simply tied a double knot and trimmed the edge a bit.
Step 18. Decorate the cover. I picked up some cute glitter mickey stickers, so I used some of the extra card stock to create a background and then I placed my stickers and added each girl's name to the cover.
Anyway, we are bringing 3 girls, and while this trip has been something we've been planning on for quite some time, I still want to find ways to cut costs where possible. I decided to make autograph books for the girls instead of buying them at the park. Considering I had most of the supplies on hand, I was able to make 3 books for about $8, and my guess is that is probably the cost of 1 in the park.
Autograph Book Supplies:
Cardboard/chipboard
Cardstock for cover
Cardstock or drawing paper for inside pages
Ruler
Pen/pencil
adhesive/glue stick
hole punch
scissors/paper trimmer
brads/yarn/page rings/some type of closure for the binding
Step 1: Decide the page size since it will determine the size of the cover. I decided to go with a finished 4" x 6" page, but to allow room for the binding, my inside pages were 4" x 7". I added an inch to those measurements to allow for the cover. Once determined the size, I cut my chipboard to size. For this project, I actually did two layers of chipboard just because I wanted extra sturdiness.
Step 2: Create the bind edge. Once I had my chipboard cut to the 4" x 7" size, I cut an inch off. I did this so that the cover had more give in order to allow for the book to open flat but still maintain sturdiness. I was making 3 books, so I took an assembly line approach and cut everything all at once.
Step 3. Cut your cover cardstock. For the cover, I added 2 inches to the size of the chipboard, so I cut 7" x 9". This is going to be an example of an imperfect project. The sad part is, I realized my mistake on the first book, but repeated the same stinkin' mistake on my second book. You'll see it at the end if you haven't noticed already.
Step 4. Center your chipboard on the back side of your cover paper. If you have been hanging around the blog for awhile, you've probably already guessed that I just eyeballed this. If you are new, I'm not all into perfect measurements. Just get it close enough and move on to the next step.
Step 5. Time for the glue or adhesive. Little tip, keep once piece in place while getting the other down, that way you don't lose your centering. You will want to leave a little spacing between the two pieces of chipboard...I leave about as much space as the chipboard is deep, 1/8th-ish inch or so.
Step 5. Once you have your chipboard secure, you'll want to cut your corners. There are two schools of thought. One says to just cut the corner off of your paper in a triangle that butts up right against the corner of your chipboard. I have varying degrees of success with that, so I employ the method shown above which is cut it at an angle to right above the corner and then cut back out. No measuring, but you can play with these two options and see what works best for you.Next step, adhere your flaps down. Make sure you get it tight against the edges.
Step 7. Flip the book over and take both of your hands and grab the book so that both of your thumbs meet in the middle (I had to take a picture, so pretend my left thumb is there looking exactly the same as my right). Then using your fingers to bend the binding up, use your thumbs to crease the paper, so that it creases inside the fold. You'll run your thumbs down the middle of the crease to keep the paper going in the direction you want. If you don't employ this thumb maneuver, your paper might crease/bubble on the outside of the fold.
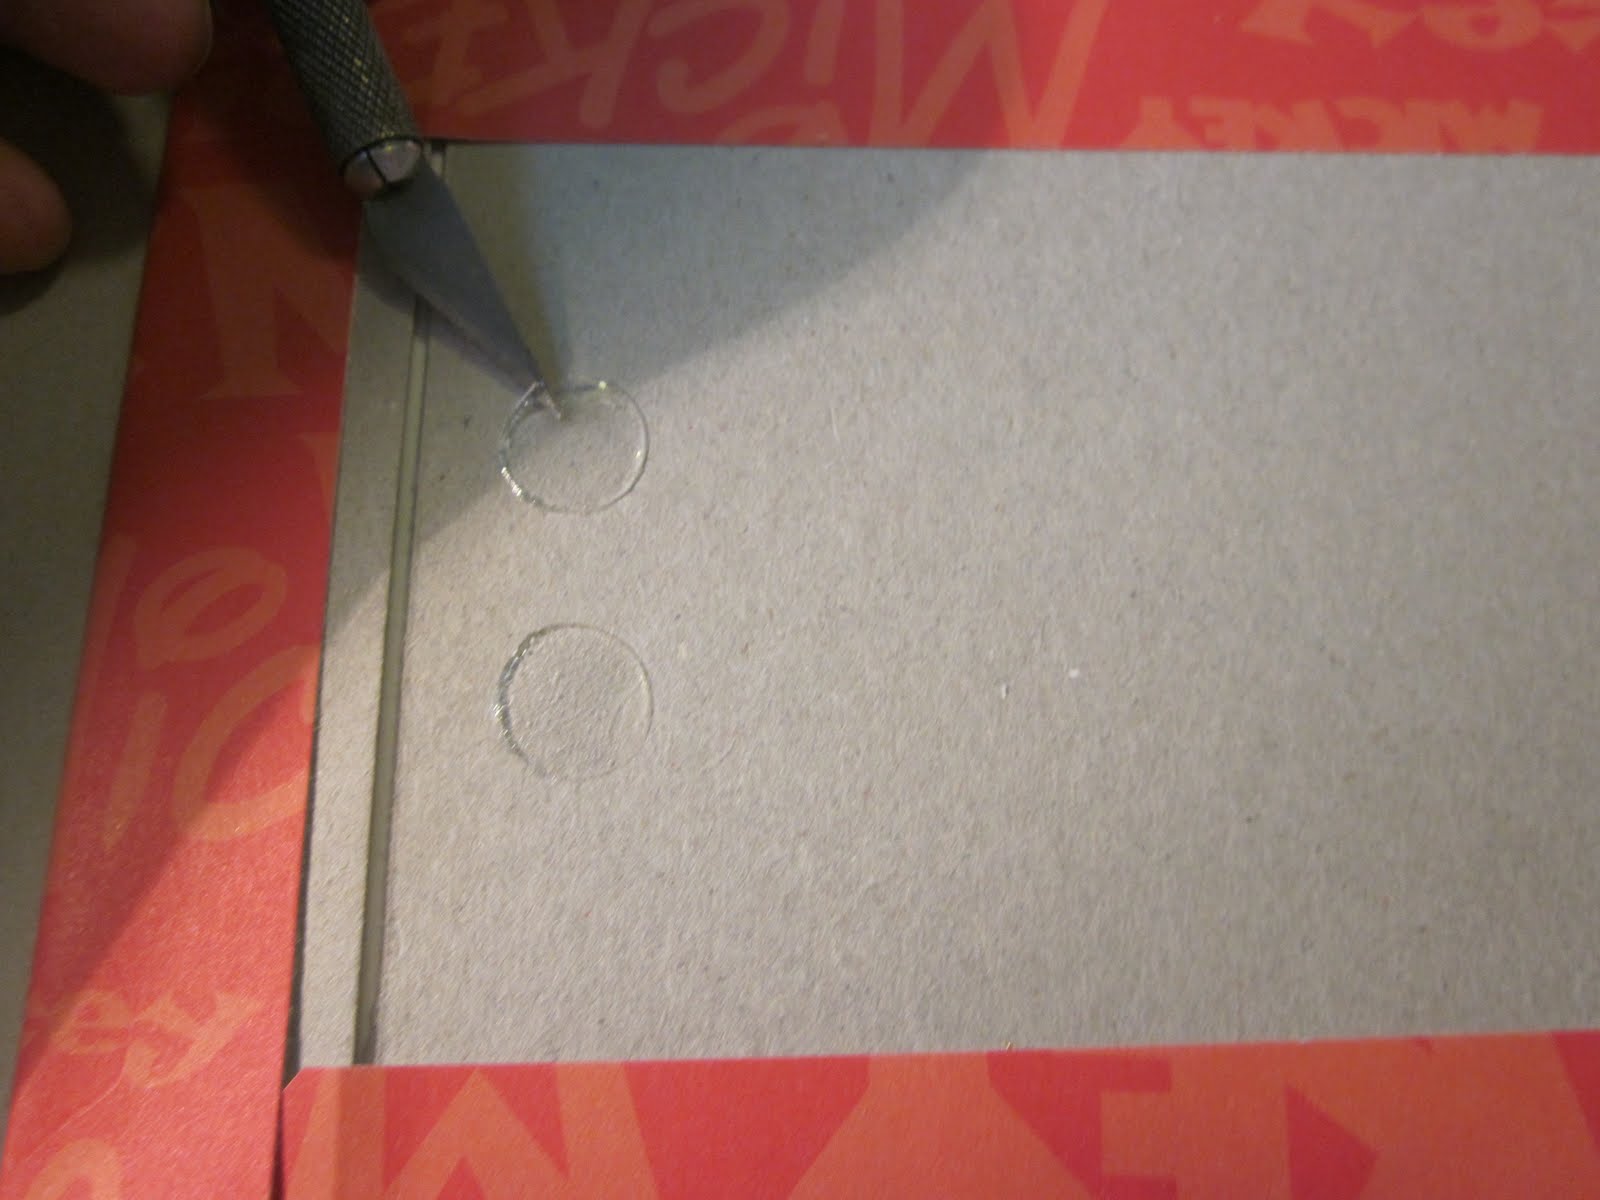
Step 8. Looky here - I'm measuring! Now for the pages. So here, I measured an inch on the side of the page, and then at the 1" and 3" mark, I drew a perpendicular line. This is all leading up to cutting some holes in the book.Next, I found the half inch mark on each short line and marked the spot with an x.
And then I punched. Note - if you are doing 3 of these suckers, go ahead and invest in a 3 hole punch. I used to have one and don't know where in the world it took off to, but after this project of punching 100+ holes, I'm getting a new 3-hole punch.
For those of you who are taking the single hole route, you only need to draw/mark one page. From there, just stack 2-3 (whatever is not too stressful to cut through) pages behind the already cut page, and line your punch up to cut within the holes you have already cut. Repeat this process until you have all of your pages cut. For each new batch, I used a different template to work from. I did this to lessen my chances of cutting the holes too big on one page which inevitably happens when using the same template over and over. For each book, I did about 20 pages.
Step 11. Back to the cover. Ok, so in the first picture did you notice that little Sharpie marker? Well, I thought it would be a good idea to fasten the pens to the books. So here's how I did it. Take the big glue dots and run a line of them down your back cover. I chose to place mine right by the binding, but you can choose another area - whatever is most comfortable for you.
Step 12. Cut a long piece of ribbon. I cut about a foot and a half of thin red ribbon. I placed it on top of the glue dots like you see above.
Step 13 (picture not available), cover both of your inside covers with cardstock. For my inside cover, I chose a paper that complimented my covers. Since the total size of the cover was 4" x 7", I subtracted about 1/4" of an inch total - 1/8" on each side. Put a lot of adhesive on this paper, making sure that you have it running up against the edges of the paper.
Step 14. Take one of your inside pages and line it up along the spine of the back cover. Mark another x, and punch holes.
Step 15. Take your back cover, and place it right side out on top of your front cover which should be right side out as well. Once they are aligned, mark an x or trace the hole circles on the inside front cover so you know where to punch.
Step 16. Assuming you have cut all of your pages, you are ready to assemble the whole thing. I used brads to keep my pages in place. I did this for 2 reasons. First, I'm anticipating that I might need more signature pages, so I want an easy way to get back in the book. Second, my goal is to add pictures to this when all is said and done and I don't know if I will need more pages or not, so again - I want access to get back in. You could use yarn or ribbon and just do a loop and cut into it later if you want. You can also use binder rings.To keep small fingers from opening the brads, I covered each one with stickers.
Step 17. Attach the Sharpie. These were perfect since they had the little hook on the cap. I simply tied a double knot and trimmed the edge a bit.
Step 18. Decorate the cover. I picked up some cute glitter mickey stickers, so I used some of the extra card stock to create a background and then I placed my stickers and added each girl's name to the cover.
Obviously, this is Emily's finished book. Did you notice what is "wrong" about these? Take a good look at the paper. The words are upside down. The second book is just a page filled with the outline of Mickey's head so it's a LOT more noticable noticeable but such is life. I didn't have the character paper to start over with, and the girls didn't even notice until I pointed it out. Not all projects turn out perfect. What's more important to me is that it's done, and in this case cute and functional.
I'm thrilled with how these came out and the girls seem excited to use them. Here's hoping we'll have enough room for all of the signatures we collect!
Wednesday, May 18, 2011
Creative Storage Solutions
We lived in NYC for a year, and while we learned many life lessons through that experience, one of the things that I developed a true appreciation for was storage. Living in a small space makes you get really creative with how you store things. With all of that said, I'm proud to say that most of the ideas I'm about to share were things I employed prior to our stint in the big apple but sharing a craft room with a little person keeps me on my toes to ensure I'm using all available resources for storage. If I had a zillion dollars, I'd probably have one of those rooms where everything matched, but I don't have a zillion dollars and I have an affinity for clearance sales, garage sales and junk shops so my storage solutions are a bit more hodge podge.
Case in point. My halloween baskets from Pier One. I got these (plus 2 more) for 10 cents each. Seriously. You wouldn't have walked by either. The baskets sat unused last Halloween, but since then I've decided to put them to work in my paint room closet. I used those temporary hooks on the bottom side of the top shelf, and they hang great. Frankie there currently holds crepe paper, while the Jack-o-lantern holds our washable markers. The pumpkin sees a ton of action. The thing in the bottom left corner is an old bread/coffee/flour/tea box. I found it a few years ago, and while I've threatened a few times to paint it, it sits as I bought it for a cool $20.
More closet storage. Lime green is one of my favorite colors, and when the paint room lived downstairs (prior to the NYC thing), three of the four walls were lime green. I found these cookie/flour jars at a garage sale I think. The smallest one holds buttons, the middle one holds wine corks and the big one holds decorative scissors. Every time I look at them I smile.
As I have gotten older, I've come to appreciate the dollar store. We got this coat hook rack forever ago for a buck. When I moved the paint room in to the spare bedroom upstairs, this hook was in the closet, so I use it to hold anything that has a hole or strap. It's currently holding a bunch of skeleton heads that I got after Halloween last year.
Flower pots are rad. They are so versatile and you can use them for so many things. I've had this pot for years - at least 10 if not more. It once held a plant, but now it holds court on the corner of my paint room table and keeps my pens, x-acto knives and scissors mostly in order. It's another thing that just makes me happy.
What creative storage solutions have you used?
Case in point. My halloween baskets from Pier One. I got these (plus 2 more) for 10 cents each. Seriously. You wouldn't have walked by either. The baskets sat unused last Halloween, but since then I've decided to put them to work in my paint room closet. I used those temporary hooks on the bottom side of the top shelf, and they hang great. Frankie there currently holds crepe paper, while the Jack-o-lantern holds our washable markers. The pumpkin sees a ton of action. The thing in the bottom left corner is an old bread/coffee/flour/tea box. I found it a few years ago, and while I've threatened a few times to paint it, it sits as I bought it for a cool $20.
More closet storage. Lime green is one of my favorite colors, and when the paint room lived downstairs (prior to the NYC thing), three of the four walls were lime green. I found these cookie/flour jars at a garage sale I think. The smallest one holds buttons, the middle one holds wine corks and the big one holds decorative scissors. Every time I look at them I smile.
As I have gotten older, I've come to appreciate the dollar store. We got this coat hook rack forever ago for a buck. When I moved the paint room in to the spare bedroom upstairs, this hook was in the closet, so I use it to hold anything that has a hole or strap. It's currently holding a bunch of skeleton heads that I got after Halloween last year.
Flower pots are rad. They are so versatile and you can use them for so many things. I've had this pot for years - at least 10 if not more. It once held a plant, but now it holds court on the corner of my paint room table and keeps my pens, x-acto knives and scissors mostly in order. It's another thing that just makes me happy.
What creative storage solutions have you used?
Monday, May 16, 2011
How To Make a Sticker Book
If you have kids under the age of 10 in your life, especially girls, chances are you also have a lot of stickers. The stickers in our house are out of control - they are everywhere. Em is pretty good about not putting them where they don't belong, but we do have to watch the laundry to make sure we get all of the stickers off of our clothes or else run the risk of winding up with sticker residue.
Over the weekend, we cleaned up her room and the paint room and I discovered how many sheets of stickers she really had. I decided it was time to make her a sticker book. If you've never done this before, it's super easy to do. Not only will it give your kids a place to put their stickers, but they are reusable since the book's pages are made of wax paper!
Sticker Book Supplies:
Cardstock, construction paper or some type of heavier paper for your cover
Wax Paper
Glue stick or double-sided tape runner
Paper trimmer or scissors
Ruler
Brads or yard
Hole punch
Step 1. Decide the size and create your cover.
Since I have a ton of 12" x 12" scrapbook paper, I decided to go with a 6" x 6" book. So I cut the paper in half, and then folded each half in half to make the covers a little sturdier. Once I folded them, I used my tape runner to keep the paper folded in place.
Step 2. Create your pages.
Considering the purpose of this book, I didn't get too fussy with trying to figure out how much wax paper I needed before I started. I just pulled a big sheet of wax paper off, and figured if it wasn't enough I could always get more. Once I had my big sheet, I first started by trimming each edge so that I was working with a straight edge. Next, I grabbed my ruler and folded my first page at the 6" mark.
Step 4. Fold the pages
I just used a simple accordian fold for the pages. You can do whatever works for you. I wound up with a little extra wax paper at the end of my sheet, so I just trimmed that off.
Step 5. Trim the pages
Again - my rule here was to keep simple, so I did not cut each individual page. Instead, I left two pages together and cut the third page off, repeating the process until I reached the end of my sheet. I did have a couple of single pages, but once they were all bound in the book, you can't tell what's where. Just make sure that once you have all of your pages cut, you have all of the folds on the side that will be bound. I think I wound up with 9 pages total.
Step 6. Assemble the cover and pages
Stack the pages the best you can - wax paper can make this a little tricky. Align your front and back cover, and again - get all of the paper aligned the best you can. You can trim the excess after the next step, if you want.
Step 7. Bind the book
For this project, I just used brads. I eyeballed the holes and punched 3 small holes. I used brads that I had on hand, but you could also use yarn to tie the pages together, staples or binder rings...whatever works for you.
Step 8. Trim the excess paper and decorate.
Now that your book cover and pages are secure, you can trim up the edges. If you have an 7+ year old, they can probably do this entire project on their own and they might not want to trim - which is totally fine. We finished our book off by adding (mommy's) stickers to the front where we spelled out, "Emily's Sticker Book."
And as soon as that was done, someone had the perfect sheet of SpongeBob stickers to christen the first page with!
Sunday, May 15, 2011
Where to find Green bird of Happiness!
Source: robot-heart.tumblr.com via Kerry on Pinterest
I'm so so happy to have so many new followers of the blog - WELOME! Each new fan makes my heart smile - thank you! In case you weren't aware, there are several other places where you can connect with me:
You can become a fan of Green Bird of Happiness on Facebook (don't tell anyone but I plan on doing a fun giveaway when I get to 100 fans)
You can find me on Twitter
You can also find me on Pinterest.
That's all for now - heading back into the Paint Room to work on some new projects! Happy Sunday everyone! xo
Saturday, May 14, 2011
Telling the negative inner voices to shuttup
| Emily Balivet's Mezzo Goddess |
I hate that damn voice.
I've thought about naming it, so I can yell at it and curse it properly. It feels like it would be easier to make it go away that way. Perhaps I should think of a name, but in the meantime, I've been working on getting him out of my head again (my voice is male which I've always thought was a little odd, but I roll with it since this isn't the kind of dude I really want to argue with).
Thank goodness I've been able to sort out the ways that work best to silence the voice. For me, it's 2 things work consistently well.
1. Finding someone to talk to an acknowledge the fact that I'm feeling vulnerable. Usually once I can spit the words out of my mouth or type them out in a note or message, the feelings and thoughts suddenly start to lose their power and the clouds and darkness start parting. Sometimes it's really, really hard to get to that point but it always feel so good when I do. Oh, and there is usually a tear or two involved too.
2. The second thing that helps is re-setting my focus. Instead of thinking "I can't, I can't" I start to think about what makes me happy and how far I've come with my personal goals and I start to hear my own voice again. I give the power back to me and that voice, that damn voice, goes away again. If only there were a proper receptacle in which to dispose of him. I would crumple his sorry butt up and stuff him inside.
It's a part of the process I guess. I don't know anyone who hasn't had a moment of self-doubt. The trick is not to get stuck there.
How do you deal with that negative inner voice?
Tuesday, May 10, 2011
Creative Flower Vases
I love flowers. I especially love cut flowers in my house. Although big, fancy arrangements are nice, for every day charm little arrangements suit me fine. Sometimes I'll break out the stool to get to the cabinet where my nice vases are stored, but usually I just opt for a simple, more casual, fun way to display the blooms.
Tin cans are one of my favorites. They are so versatile. You can wrap them in paper, you can tie a simple ribbon around them, you could paint them, glue things on them and the list goes on an on.
I also love using spice jars. Back in the day, I used to hunt for cheap spice racks at yard sales or junk stores. Back in the day, I painted them. Now, I just use the left overs for mini arrangements. These are great for kid's rooms, bathrooms or small shelves or window ledges. I like that it's unexpected and that after closer inspection people usually really get a kick out of the fact that these are spice jars.
I'd be a bad southern girl if I didn't mention mason jars in this post. Mason jars have so many applications, but there's something pretty perfect about the mason + flower combination.
I've also been drawn to old tins and flowers. I've seen a number of different pictures across the interwebs lately, and it's definitely inspiring me to look for tins as I hit antique stores this spring and summer.
What fun ways do you display flowers?
Tin cans are one of my favorites. They are so versatile. You can wrap them in paper, you can tie a simple ribbon around them, you could paint them, glue things on them and the list goes on an on.
I also love using spice jars. Back in the day, I used to hunt for cheap spice racks at yard sales or junk stores. Back in the day, I painted them. Now, I just use the left overs for mini arrangements. These are great for kid's rooms, bathrooms or small shelves or window ledges. I like that it's unexpected and that after closer inspection people usually really get a kick out of the fact that these are spice jars.
I'd be a bad southern girl if I didn't mention mason jars in this post. Mason jars have so many applications, but there's something pretty perfect about the mason + flower combination.
I've also been drawn to old tins and flowers. I've seen a number of different pictures across the interwebs lately, and it's definitely inspiring me to look for tins as I hit antique stores this spring and summer.
What fun ways do you display flowers?
Subscribe to:
Posts (Atom)